This year someone may be receiving a card similar to this...
Sunday, February 12, 2012
Monday, February 6, 2012
The Fish-Eye

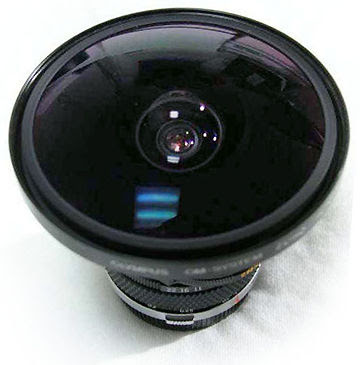
Ive always wanted a fisheye lens for a camera. The effect in my opinion was always pleasing to the eye. Getting a somewhat distorted but wider view of things. In order to take pictures like this ones options are to either buy an expensive camera with changeable lenses and then buy a separate fisheye lens or go with a cheaper non-digital alternative.
Of course, the least expensive quality camera i could come across would be at least $600 at base price. Then the extension would cost another $200. To get a proper carrying case and the right equipment that should go with this caliber of a camera would bring be to a total of almost $1000. An expensive hobby indeed!


Another option is to buy a camera made for fisheye photography. There are a few brands that make cameras with these specialized lenses starting from $50 and moving on up. Of course, the one below is a glorified version of what you could get. Most of these cameras are made out of plastic and use 35mm film.

However much i would love to buy one of these cameras, considering the cost is quite important. On one end I have no choice to wait until i am a little less poor to get started on this style of photography. On the other end, I want this capability so much that i can easily settle for a cheaper alternative. However, this alternative involves film :(. Unfortunately for me, I am quite spoiled by digital technology.
Luckily, I found myself a 3rd option. Using an old digital camera to start with, I decided to build my own fish-eye lens at home. After some research and a look at what other people had done, I decided to try something out.
 First I started out with a wide angle door viewer, a pvc pipe and some craft foam. All of the materials I used were from a local hardware store, craft store or my own garage.
 Careful cutting and precision measuring helped me build the perfect fitting for my digital cameras lense to fit nicely into the foam. Also, coating the door viewer with the foam helped to create a centered piece that would fit nicely into the pvc pipe while being centered with the camera lens.
 After putting everything together carefully, I was able to build a complete lens. To make it look nice, all it needed was some high quality black ducking tape. The entire thing was built out of 4 basic materials.
 After the lens was complete I attached it to the old camera. Of course, I wanted to make sure it was the old camera... just in case the fitting of the lens was too rough. Since these cameras aren't really meant for such extravagant attachments I thought it was quite nice.
 In the end i was able to make a nice looking extension of my camera. I was able to successfully build and test my new fish-eye lens. And the best part was.. I made it myself!
Its not perfect, the sides are still visible unless you adjust the zoom right. However, considering the alternatives and the cost, I would say the small less than $20 i need to build this was quite worth it. With a little more work and adventure I hope to take some great pictures with this soon!
Subscribe to:
Comments (Atom)

